Learn how to convert logo into Barudan embroidery file format with clean digitizing, better stitch quality, and smooth machine performance.
Convert Logo into Barudan Embroidery File Format
A logo may look perfect on a screen, but embroidery machines see things very differently.
That sharp image, smooth gradient, or tiny text in your logo cannot simply be “uploaded” into an embroidery machine and stitched perfectly. Before a Barudan embroidery machine can read it, the logo must be converted into a proper embroidery file format.
This process is called embroidery digitizing.
If you want clean stitching, smooth production, and professional embroidery results, understanding how to convert logo into Barudan embroidery file format is essential.
In this guide, you’ll learn how the conversion process works, why it matters, common mistakes to avoid, and how professional digitizing services like Digitizing Buddy help create production-ready embroidery files.
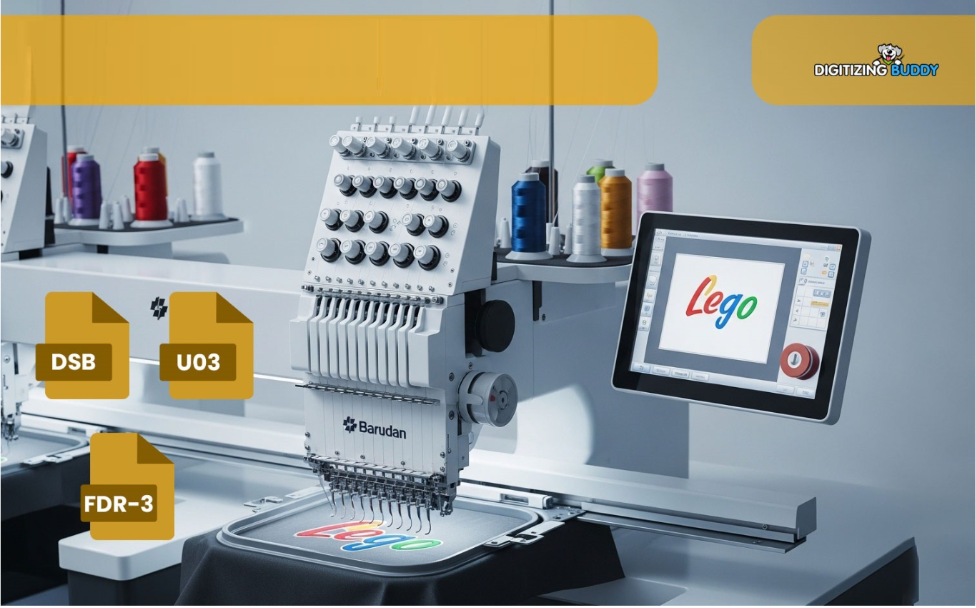
What Is a Barudan Embroidery File Format?
Barudan embroidery machines use specialized embroidery file formats that contain stitch instructions instead of image data.
Unlike JPG, PNG, or SVG files, embroidery files tell the machine:
- Where stitches should go
- Which stitch type to use
- Thread color sequence
- Stitch direction
- Density settings
Without proper conversion, the embroidery machine cannot understand the design correctly.
Why You Cannot Directly Use a Logo Image
Many beginners think embroidery works like printing. Unfortunately, it doesn’t.
A logo image only contains visual information. Embroidery machines need technical stitch data.
For example:
- A printed gradient must become stitch layers
- Thin lines may need thicker satin stitches
- Tiny text may require simplification
That’s why logos need to be digitized before embroidery production.
What Does “Convert Logo into Barudan Embroidery File Format” Mean?
The process involves transforming a logo or artwork into a machine-readable embroidery file compatible with Barudan embroidery machines.
This includes:
- Analyzing the logo
- Mapping stitch paths
- Choosing stitch types
- Setting stitch density
- Optimizing thread trims
- Exporting the correct embroidery format
It’s both a technical and creative process.
Step-by-Step Process to Convert a Logo
1. Start with a High-Quality Logo
Clear artwork creates better embroidery results.
Best File Types
- PNG
- AI
- EPS
- SVG
- High-resolution JPG
Blurry or low-quality images make digitizing harder and reduce stitch accuracy.
2. Analyze the Design
The digitizer studies:
- Shapes
- Colors
- Small details
- Fabric type
- Embroidery placement
Not every detail in a logo can be embroidered exactly as shown on screen.
Sometimes simplification improves stitch quality dramatically.
3. Select the Right Stitch Types
Different parts of the logo require different embroidery stitches.
Common Stitch Types
Satin Stitch
Best for:
- Text
- Borders
- Small details
Fill Stitch
Used for:
- Large areas
- Backgrounds
- Bold elements
Running Stitch
Perfect for:
- Thin outlines
- Fine detailing
Choosing the correct stitch type helps the design stitch smoothly.
4. Adjust Stitch Density
Stitch density controls how closely stitches are placed together.
Too much density can:
- Cause thread breaks
- Create bulky embroidery
- Damage fabric
Too little density may:
- Leave gaps
- Make embroidery look uneven
Professional digitizing balances density carefully for clean results.
5. Optimize Pull Compensation
Fabric naturally shifts during embroidery.
Pull compensation helps prevent:
- Distorted lettering
- Uneven circles
- Shrinking stitch areas
This small adjustment makes a huge difference in final embroidery quality.
6. Export to Barudan Embroidery Format
Once digitizing is complete, the design is saved in a compatible Barudan embroidery file format.
The machine can now read:
- Stitch paths
- Color changes
- Needle commands
- Thread trims
At this stage, the logo becomes production-ready.
Common Problems During Logo Conversion
Even experienced embroiderers sometimes face challenges.
Tiny Text Issues
Very small lettering often becomes unreadable in embroidery.
Solution
Simplify fonts or increase lettering size.
Thread Breaks
Dense stitching or poor digitizing can cause thread snapping.
Solution
Optimize stitch density and reduce unnecessary overlaps.
Fabric Puckering
Improper stabilizers or heavy designs may wrinkle fabric.
Solution
Use correct backing and balanced underlay stitching.
Best Practices for Cleaner Embroidery Results
Use Vector Artwork When Possible
Vector files provide sharper details for digitizing.
Avoid Extremely Small Details
Tiny shapes rarely stitch cleanly.
Match Design to Fabric Type
A logo for caps may require different settings than a logo for polos.
Test Stitch Before Production
Always run a sample before mass embroidery.
Why Professional Digitizing Matters
Good embroidery starts with quality digitizing.
Even advanced embroidery machines cannot fix:
- Poor stitch paths
- Incorrect density
- Weak underlay
- Bad sequencing
Professional embroidery digitizing improves:
- Stitch quality
- Production speed
- Machine efficiency
- Design durability
At Digitizing Buddy, logos are carefully digitized to ensure smooth stitching and compatibility with Barudan embroidery machines.
Benefits of Converting Logos Properly
A professionally converted embroidery file provides several advantages.
Better Stitch Accuracy
Designs look sharper and cleaner.
Faster Production
Optimized stitch paths reduce machine downtime.
Less Thread Waste
Efficient digitizing minimizes trims and breaks.
Professional Appearance
High-quality embroidery improves brand image.
How Long Does Logo Digitizing Take?
Simple logos may take less time, while detailed artwork requires more adjustments.
Factors that affect turnaround:
- Design complexity
- Number of colors
- Stitch count
- Fabric type
- Size requirements
Clean artwork usually speeds up the process.
Conclusion
Learning how to convert logo into Barudan embroidery file format is essential for achieving clean, professional embroidery results.
Embroidery machines don’t read pictures the way humans do. They rely on carefully planned stitch instructions, density settings, and optimized digitizing to create smooth embroidery.
From selecting the right stitch types to adjusting pull compensation, every step affects the final quality of the design.
Whether you’re creating embroidered uniforms, caps, jackets, or promotional items, proper digitizing helps reduce production issues and improves overall embroidery performance.
And when you need production-ready embroidery files designed specifically for Barudan machines, Digitizing Buddy can help turn your logo into clean, stitch-perfect embroidery.
FAQs
What file format does a Barudan embroidery machine use?
Barudan embroidery machines use specialized embroidery file formats that contain stitch instructions for embroidery production.
Can I directly upload a JPG logo into a Barudan machine?
No. JPG images must first be digitized into an embroidery file format that the machine can read.
Why does my embroidered logo look different from the image?
Embroidery has physical stitch limitations. Small details, gradients, and thin lines often need adjustment during digitizing.
What is the best logo format for embroidery digitizing?
Vector files like AI, EPS, and SVG usually provide the best results because they maintain clear design details.